It's that time of year again....time for the new fall and winter stamps to begin coming out...so exciting! Of course, some images just call for the watercolor brush to come out of hiding!
I love using markers, but I still love even more the looks possible and speed of using watercolor.
I thought I would go over some tricks of watercolor while showing you these great new images from Serendipity Stamps. I also used Spellbinders Die to cut out a couple of the images. Notice the clean little border around the diecut? This is a fun edge I did by applying embossing ink to the actual die and then diecutting the image. Afterwards, I applied clear embossing powder to the edge and hit it with the heat gun. The clear embossing powder masks the delicate edge and keeps watercolor away, while also giving a nice little sheen. I can work very quickly wet into wet to create a very cool background.Another trick I did on the background was to apply a little paint with a sheen and then I sprinkled some table salt over the wet watercolor. Allow the paint to dry and then brush off the salt. It will create a great mottled effect. Once the cards were finished, I spattered some of the pearl color paint with a sheen over the image. Lots of things happening there, but all of them were easy and quick.
On the ghost and quail, I also did some water embossing by manipulating the watercolor paper. I outlined the area I wanted to puff out with a stylus on the image, placing the image on something soft like a mouse pad or piece of fun foam. On the reverse side of the image, you can see the outline. I applied water to the back and then manipulated the paper with the stylus. To keep the "puffiness", I used foam adhesive tape in the raised areas. Notice that the quail image was torn out and spattering applied using brown paint. This gives a more rustic look.
To make the pumpkin pop, I applied some glossy accents and allowed it to dry. Also, a little glitter was added to the spider, bat and face of the ghost.
Here are a couple shots showing the cutting side of the Spellbinders die. The VersaMark ink was applied directly to the cutting side of the die and then clear embossing powder added to the cut out images. But don't throw away the outside portion...below, you can see that I applied gold embossing powder and will use this for another project.
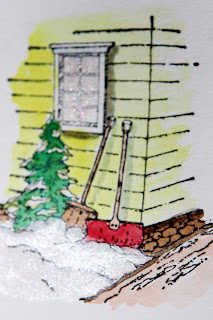
Watercolor paint with a sheen is a great accent like on the window and snow above. I prefer to use it in limited amounts, only on what I want to really stand out.
Another way to make an image pop is to layer a portion of the image. Below, I stamped extras of the hand with the watering can, hat, face and scarf. I used pop dots to add dimension between the layers.
The sun was really bright when I took the photos below, so the colors are a little washed out compared to real life, but hopefully you will enjoy seeing the great new images as well as try some of the watercolor techniques I have included. Just do a search on my blog to see more posts on watercolor techniques.
Serendipity also has great word stamps to go with these images, but I wanted to focus on the new images and some watercolor techniques. Enjoy! Wow, I haven't even pulled out the watercolor crayons yet....or the Copic markers! So many possibilities! Oh, and I just saw on the Serendipity website that they are offering free shipping on orders over $10....whooo hooo! I love free shipping!


No comments:
Post a Comment