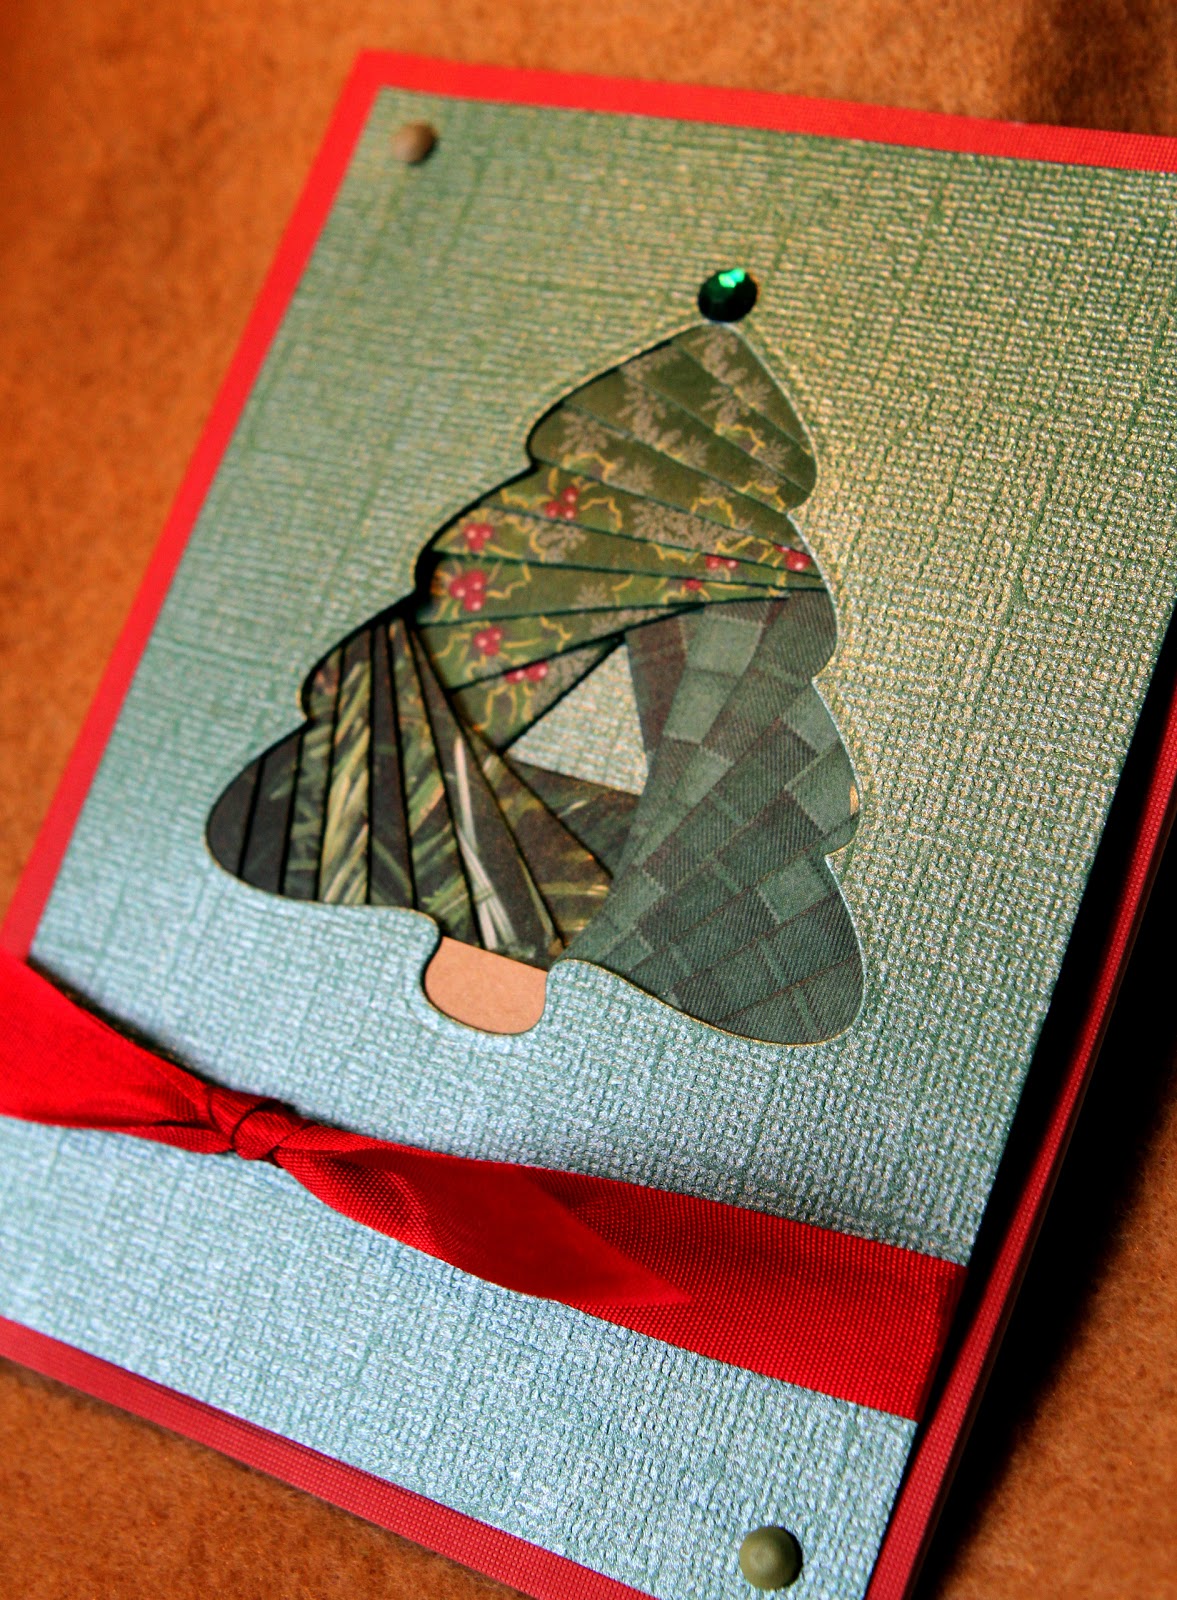
Showing posts with label Serendipity. Show all posts
Monday, September 29, 2014
Halloween Cards with Serendipity Stamps
It's that time of year again! This year for Halloween cards, I used Serendipity Stamps, the new Serendipity "Boo" die, Sizzix die, Accucut Die and EK Success punches, along with some decorative paper. I colored with Copic Markers and watercolor.
There are eight panel images on this first card (four on each side), all stamps from Serendipity. It took a while to color all the images as I made several of this card, but I do love Halloween!
The Trick or Treat bag is pop dotted on the front (or back, depending on how you look at the card) and I made little bows using a fork. I love that method of making small bows! There are several tutorials online.
I cut some vellum ghosts with Sizzix die and punched some spiders and skull and crossbones borders to embellish the card.
I really love the new "Boo" die and the new Kitty and Jack stamp shown below. I actually have more than eight Serendipity images that would work on this card, so I had a hard time deciding and combined some of the images together.
The "Boo" die I cut out of a metallic card stock, so it really catches the light and grabs your attention.
I die cut A7 size envelopes using scrapbook paper (the bats below) and die cut ghosts on sticker paper on which I wrote the address.
Next to the envelope is another card I did that flips (AccuCut die), again using the Boo!
When the card flips, you are greeted by Kitty and Jack, done in watercolor.
I also did some with this old favorite from Serendipity! I just love her!
Hope you have a wonderful Halloween! I am working early voting for the elections the week of Halloween, so I had to get my cards done early! I hope the post office doesn't fuss about my envelopes!
Wednesday, July 30, 2014
Don't Whine..Use Twine!..The Twinery and Serendipity Stamps Blog Hop
Do you get bored with the same embellishments?
An embellishment that I enjoy using is twine. Here are some examples of ways to use twine, all used with Serendipity Stamps and twine from The Twinery.
When I was asked to take part in this blog hop, I could not resist!
I love nautical themes, lighthouses and die so what is not to love about the new Serendipity Stamps
lighthouse die and stamps set? It is so simple to cut a backing for the lighthouse with whatever color you want your stripes to be.
Below, you can see that I have used twine as edging and as an embellishment (netting that I made with the solid natural twine) on this side step card.
Here is another nautical themed card where I used twine as edging, as an embellishment for a stamped image (on the sailboat) and as a closure.
Another theme that I think works very well with twine is sewing. Here the edging is a blanket stitch around the card. I also embellished the stamped images such as the spool of thread, quilted heart as well as adding twine to the die cut "Hello" and actual buttons used on the heart.
While you can use twine on most any card or scrapbook layout, I think it works great with the nautical and sewing themes.
In addition to the Lighthouse set from Serendipity Stamps, I used Whelk Shell Small, Joy is a Net, Hello die, Sewing and Quilted Hearts Set. In addition to the natural solid twine, I used Midnight blue stripe, Maraschino Solid, Honeydew Stripe, Blossom Stripe and Lilac Stripe.
As with most blog hops, there are PRIZES! Visit the Serendipity Stamps Facebook page, The Serendipity Stamps Blog and The Twinery Blog for details!
Hope you enjoyed seeing these ideas of ways to use twines! Be sure to click on the links below and stop by all the other blogs participating in the blog hop today:
The Twinery
Serendipity Stamps
Jeanne Jachna
Tobi Crawford
Denise Hahn
Sue Eldred
DoBea Alberts
Kathie Bailey
Jennifer Cuthbertson
Bridgit Edblom
Holly Craft (that is where you are)
If you are going in order visiting the blog hop posts, your next visit will be Denise Hahn listed above.
Thanks for stopping by! I can't wait to see all the ways to use twine that will be featured in this blog hop!
Holly
Friday, August 10, 2012
Using Diecuts for Iris Folding...Create your own Pattern!
I remember how complicated Iris Folding appeared to be when I first saw it. Though it takes a little time, it is actually quite easy. One way to make it even easier is to use diecuts for the aperture shape. Here I have used shapes cut from dies and geometric iris folding patterns to customize a pattern for that shape. The tree, owl, mitten and cup are all Spellbinders die while the pumpkin and ornament are from Serendipity.
Most patterns are a geometric shape...triangle, square, pentagon, hexagon or oval. The templates for these geometric shapes can be found online. One source I found is here at IrisFolding.com. In addition to the geometric shapes, they have alphabet, numbers and several decorative shapes. They also sell a book called Simplicity of Iris Folding. I have not seen the book, but you can learn how to do Iris Folding online, if you don't understand the concept.
Another source for patterns and information is the Yahoo group. Iris Folding at Yahoo Groups has recently been revived and has become quite active. I recommend this group!
I suggest you get a loose leaf notebook, some page protectors and print the five geometric shape templates. Using a page protector keeps your pattern from getting messed up. Diecut your aperture from cardstock. Use reposition able tape along an edge so that you can lift your design as you work it and check on the progress. You can also print on acetate and then look on the other side of the pattern to check on your progress.
I choose the shape I use depending on the basic shape of the diecut. I meant to use the triangle on the owl going the other direction to form a beak....I will correct that next time I do an owl design! The shape you choose will also determine how many different papers you use. On the ornament, I used each of the wrapping papers twice rather than using four different papers. I like wrapping paper as it is thinner and doesn't create as much bulk.
Below, you can see the geometric shapes I have printed on acetate and placed in a protector. Patterns are often numbered and then a letter added to show the order and what paper to use.
Another way to show the paper to use is to color the design (these I drew in pencil on vellum) like I did on the cup. First trace the aperture and then place over the desired geometric shape. You might have to continue the pattern to fill up the aperture. I draw them on vellum (or tracing paper) so that I can see the geometric pattern beneath it. Using this technique, you can create an iris folding pattern for most any shape you can diecut!
Sometimes shapes will call for you to create a pattern. Several years ago I created a pattern for a tie (business envie size) for which I used safety envelopes for the paper. It was published in The Rubber Stamper Magazine. Recently, I found a die (Dee's Distinctively Dies) that cuts a tie, so I drew out the pattern for this tie, beginning at the edges and going in. An iris folding pattern is basically a shape in graduated sizes, tilted a little each time. I actually made two separate patterns for the two areas, just as you would for butterfly wings, etc. Sometimes the folding pattern actually becomes part of the design of the shape. If you look at some of the photos at the Yahoo group, you will see what I mean.
I have not done Iris Folding in years, but with the revival of the Yahoo group as well as new die in my stash....I had to give it a visit! I am a little rusty! My friend, Jan Castle, does some of the neatest Iris Folding I have ever seen!
So, pull out those die and papers and have fun!
Most patterns are a geometric shape...triangle, square, pentagon, hexagon or oval. The templates for these geometric shapes can be found online. One source I found is here at IrisFolding.com. In addition to the geometric shapes, they have alphabet, numbers and several decorative shapes. They also sell a book called Simplicity of Iris Folding. I have not seen the book, but you can learn how to do Iris Folding online, if you don't understand the concept.
Another source for patterns and information is the Yahoo group. Iris Folding at Yahoo Groups has recently been revived and has become quite active. I recommend this group!
I suggest you get a loose leaf notebook, some page protectors and print the five geometric shape templates. Using a page protector keeps your pattern from getting messed up. Diecut your aperture from cardstock. Use reposition able tape along an edge so that you can lift your design as you work it and check on the progress. You can also print on acetate and then look on the other side of the pattern to check on your progress.
I choose the shape I use depending on the basic shape of the diecut. I meant to use the triangle on the owl going the other direction to form a beak....I will correct that next time I do an owl design! The shape you choose will also determine how many different papers you use. On the ornament, I used each of the wrapping papers twice rather than using four different papers. I like wrapping paper as it is thinner and doesn't create as much bulk.
Below, you can see the geometric shapes I have printed on acetate and placed in a protector. Patterns are often numbered and then a letter added to show the order and what paper to use.
Another way to show the paper to use is to color the design (these I drew in pencil on vellum) like I did on the cup. First trace the aperture and then place over the desired geometric shape. You might have to continue the pattern to fill up the aperture. I draw them on vellum (or tracing paper) so that I can see the geometric pattern beneath it. Using this technique, you can create an iris folding pattern for most any shape you can diecut!
Sometimes shapes will call for you to create a pattern. Several years ago I created a pattern for a tie (business envie size) for which I used safety envelopes for the paper. It was published in The Rubber Stamper Magazine. Recently, I found a die (Dee's Distinctively Dies) that cuts a tie, so I drew out the pattern for this tie, beginning at the edges and going in. An iris folding pattern is basically a shape in graduated sizes, tilted a little each time. I actually made two separate patterns for the two areas, just as you would for butterfly wings, etc. Sometimes the folding pattern actually becomes part of the design of the shape. If you look at some of the photos at the Yahoo group, you will see what I mean.
I have not done Iris Folding in years, but with the revival of the Yahoo group as well as new die in my stash....I had to give it a visit! I am a little rusty! My friend, Jan Castle, does some of the neatest Iris Folding I have ever seen!
So, pull out those die and papers and have fun!
Sunday, September 20, 2009
Holiday Invitations
The holidays will be here before you know it! I am working on invitations for a customer for their holiday party. The theme is victorian with burgandy, cream and gold being used.
Here are some designs I came up with....thought I would share them with you. (Just in case you wondered if I ever stay home!)
Splitcoast has a tutorial for using the Spellbinders die above to create an ornament. Becca Feeken introduced this on the Spellbinders blog reveal. It is easier than it looks if you view the tutorial! The embossing folder on the burgandy is from Sizzix.
The burgandy ribbon does actually match the paper I used though it doesn't look like it in this photo. Picked this stamp up at the Archivers Hot Spot.
Above is the Tapestry JOY set and Serendipity above and below.
This is a wide Martha Stewart ribbon used above with Anna Griffin stamps....I think this is the one she is going with.
Wow, I better get going on my Christmas cards for this year!
Here are some designs I came up with....thought I would share them with you. (Just in case you wondered if I ever stay home!)
Splitcoast has a tutorial for using the Spellbinders die above to create an ornament. Becca Feeken introduced this on the Spellbinders blog reveal. It is easier than it looks if you view the tutorial! The embossing folder on the burgandy is from Sizzix.
The burgandy ribbon does actually match the paper I used though it doesn't look like it in this photo. Picked this stamp up at the Archivers Hot Spot.
Above is the Tapestry JOY set and Serendipity above and below.
This is a wide Martha Stewart ribbon used above with Anna Griffin stamps....I think this is the one she is going with.
Wow, I better get going on my Christmas cards for this year!
Tuesday, July 28, 2009
Backgrounds
Continuing here with some of the new Serendipity stamps, let's look at some backgrounds. Above, the trick or treaters were given a background done with watercolor using a wet into wet method. I like the look of this for Halloween as there are colors when there is a harvest moon that you don't see at other times. I also like the look of the edges of a watercolor wash.
These bears make me think of my trip to Alaska. I didn't see any polar bears but I did go to several glaciers and would see the pieces of ice floating along on the water. I did get photos of a group of otters using the free transportation of a piece of ice floating near the cruise ship. I added salt to the sky background while the paint was wet to get the crystallized effect you can see above. I like to use watercolor for water because of it's fluid look as seen in the water portion of the image.
Here is another winter sky done with Copics and the airbrush system. I will have to try this image with watercolor also, but I like the fading look you can obtain with airbrushing.
This background was done with more than one color of watercolor. Well, as I have told you before, Picasa lets me post four photos, so that is it for today! Let me know if you have any questions....aren't you loving these new Serendipity stamps? I have new Inkadinkado stamps to play with too, also fall and winter themed. Stay tuned!
These bears make me think of my trip to Alaska. I didn't see any polar bears but I did go to several glaciers and would see the pieces of ice floating along on the water. I did get photos of a group of otters using the free transportation of a piece of ice floating near the cruise ship. I added salt to the sky background while the paint was wet to get the crystallized effect you can see above. I like to use watercolor for water because of it's fluid look as seen in the water portion of the image.
Here is another winter sky done with Copics and the airbrush system. I will have to try this image with watercolor also, but I like the fading look you can obtain with airbrushing.
This background was done with more than one color of watercolor. Well, as I have told you before, Picasa lets me post four photos, so that is it for today! Let me know if you have any questions....aren't you loving these new Serendipity stamps? I have new Inkadinkado stamps to play with too, also fall and winter themed. Stay tuned!
Labels:
airbrushing,
copics,
Halloween,
Serendipity,
watercolor
Monday, July 27, 2009
I love to color!
First of all, let's have a moment of silence for my new camera which I did not even have for six weeks before someone decided they needed it more than me last Tuesday, broke in my house (broad daylight) and stole it, along with my MacBook Pro and several other electronic devices and various pieces of jewelry. Hours of work editing photos also went with my laptop which had all my photos from Alaska on it. Numerous books on tape were on my Zen 30 gig and 60 gig mp3 players and all my music on my new iPod nano I had only a month. It is quite depressing so I decided I needed to do some coloring to try to cheer myself up.
So, here are some new stamps from Serendipity that I took with me this weekend while in South Carolina for my husband's family reunion. I also took my Copics and my watercolor. First, let's look at an image that I colored in all three methods. The image above was colored with Copics and then the background was airbrushed with Copics. I used post it notes to mask the pumpkins when airbrushing.
This example was done with watercolor paints on watercolor paper.
The image above was done with watercolor crayons used directly to the stamp and then watercolor paints to fill in missing areas.
I thought the blue sky airbrushing on this winter scene worked especially well. I think I will add some Martha Stewart Crafts fine crystal glitter to the snow for an icy look.
When I get new stamps I like to get to know them and color them in different ways. Some stamps look and work better in certain mediums but you don't always know until you try it.
I have many more images to share and then I will be making finished cards to share. I also have some new EK Success calligraphy pens I want to try out.
Even though the robbers did take one of my monitors I use on my desktop (as well as my external harddrive I use for backup), they did not take my desktop tower. Makes you ponder about what to do about backup though....anyone use Carbonite or one of the other backup systems? I always thought that having things on two computers was a form of backup, but if someone stole both computers you would be up the creek without a paddle. Thanks for listening to my whining, but it has been a very upsetting experience. My daughter calls me the "Queen of Electronics" and they really wiped me out.
So, here are some new stamps from Serendipity that I took with me this weekend while in South Carolina for my husband's family reunion. I also took my Copics and my watercolor. First, let's look at an image that I colored in all three methods. The image above was colored with Copics and then the background was airbrushed with Copics. I used post it notes to mask the pumpkins when airbrushing.
This example was done with watercolor paints on watercolor paper.
The image above was done with watercolor crayons used directly to the stamp and then watercolor paints to fill in missing areas.
I thought the blue sky airbrushing on this winter scene worked especially well. I think I will add some Martha Stewart Crafts fine crystal glitter to the snow for an icy look.
When I get new stamps I like to get to know them and color them in different ways. Some stamps look and work better in certain mediums but you don't always know until you try it.
I have many more images to share and then I will be making finished cards to share. I also have some new EK Success calligraphy pens I want to try out.
Even though the robbers did take one of my monitors I use on my desktop (as well as my external harddrive I use for backup), they did not take my desktop tower. Makes you ponder about what to do about backup though....anyone use Carbonite or one of the other backup systems? I always thought that having things on two computers was a form of backup, but if someone stole both computers you would be up the creek without a paddle. Thanks for listening to my whining, but it has been a very upsetting experience. My daughter calls me the "Queen of Electronics" and they really wiped me out.
Labels:
airbrushing,
copics,
Halloween,
Serendipity,
watercolor,
watercolor crayons
Wednesday, May 20, 2009
Tulip Magnolia
I love photography and enjoy using my photos in my cards. When I saw this tulip magnolia stamp, I thought of this photo I took at Arlington Cemetery earlier this spring. It is a somber card, but would make a nice sympathy card. I used the Curvy Cutter, but did not cut the full oval, stopping when I came to the stamped image. I like that overlap that helps connect the stamped image with the photo. I colored the stamped image with Copics.
Subscribe to:
Posts (Atom)