I design for Perler Beads and do projects for the website. Sometimes I think of doing something they don't especially like, but you might like it.
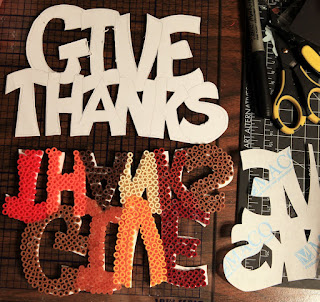
Several years ago, we were at the cabin playing with Perlers and this was before the larger square pegboard and the new SUPER sized pegboard they now have were available. The kids wanted me to do their names in Perlers so I came up with a method where I put packaging tape down with the sticky side exposed, placed the beads on the tape and then I fused them (no pegboard was used). I have since then done this method with sticky label paper and it gives me a larger area on which to work. I did this double sided "Give Thanks" centerpiece this way. It is a neat method to do for names and images that are hard to fit on the limitations of a pegboard.
Also, if you have ever done shrinky dinks or shrink plastic, you might know that you can heat it with a heat gun or in the oven. Well, Perlers are traditionally heated and fused using an iron (I like to use the little travel or craft iron size), but why not try heating them in the oven? Here are some creations where I put the beads in baking pans (cupcake tin) or inside an open cookie cutter and then cranked the oven up to about 300 degrees.
Use a silicon liner or pan, non stick spray or parchment paper so the beads won't stick. Once they look like little melted rubberbands, they are done. I have even washed them in the top shelf of the dishwasher (no heat dry). You can use larger sized bowls or pans also, like grab it bowls or loaf pans....Lots of fun and fast and easy!


No comments:
Post a Comment